In This tutorial we are going to learn the database
connectivity. In mule ESB you can connect to any database but here I will try
to connect MySQL Database.
I have created a table and inserted some data in that table:
I am using test
database and created empdetails table
in it also inserted some records as
mention in below image.

Now let’s create a program in Mule and try to connect this
database and display the results.
Step 1:
Go to File-New-Mule
Project below screen will come and give MuleDBTutorial as project name.

Now click on finish. Below screen will be there.

Step 2:
Drag the HTTP connector into the canvas.

Step 3:
Drag the Database connector into there and it will look like
as below screen.


Step 4:
Add logger connector into canvas to capture the logs.

Step 5:
Click on the HTTP connector and configure the property.

Click on “+” icon,
below screen wills popup

Click OK.
Step 6:
Now click on database
and update the property

Click on “+” icon
and choose the database from below screen.

Click on the MySQL Configuration and click ‘OK’.


Fill the necessary details.

Click “Add File”
button to add “MySQL Driver”. Once you connect MySQL driver all the error will
be gone.
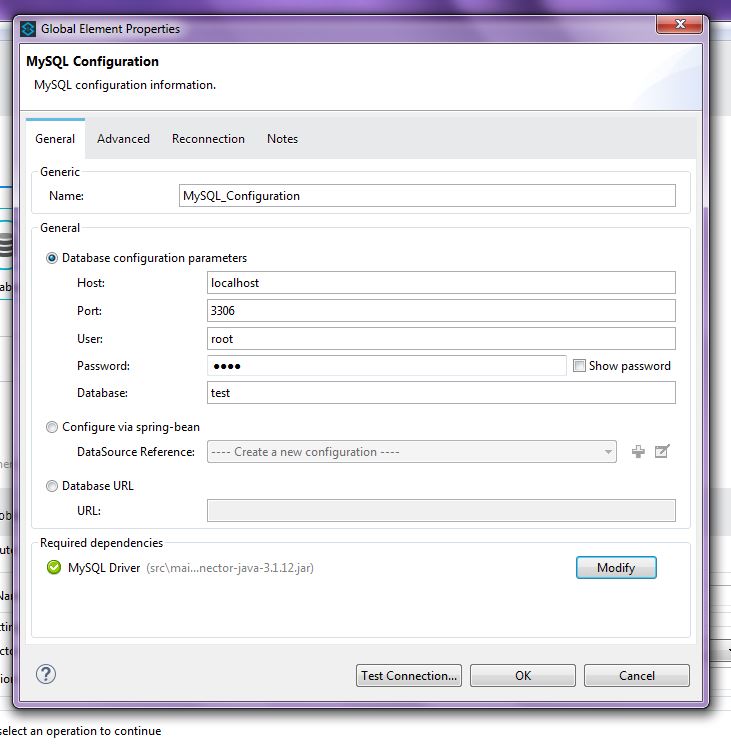
Now click on the “Check Connection” icon to test the DB
connection.

If all ok then it will give you successful message.
Step 7:
Now click on the database in canvas and configure the
property.

Choose the connection configuration as MySQL and chose
operation as “Select” and write query inside of “parameterised Query” box.
Step 8:
Now click on “Log connector” and updated the configuration.

Step 9:
Now run the programme and hit the URL in
browser or POSTMAN application, it will give you the object formed data.

Step 10:
If you want a formatted data then add one more connector
which can convert object to String and give you proper data.

Now again redeploy and run the program, it will give you the
proper data as mention below.

Step 11:
Now if you want a parameterized data then add a variable as mention below and pass a particular value.
Now if you want a parameterized data then add a variable as mention below and pass a particular value.
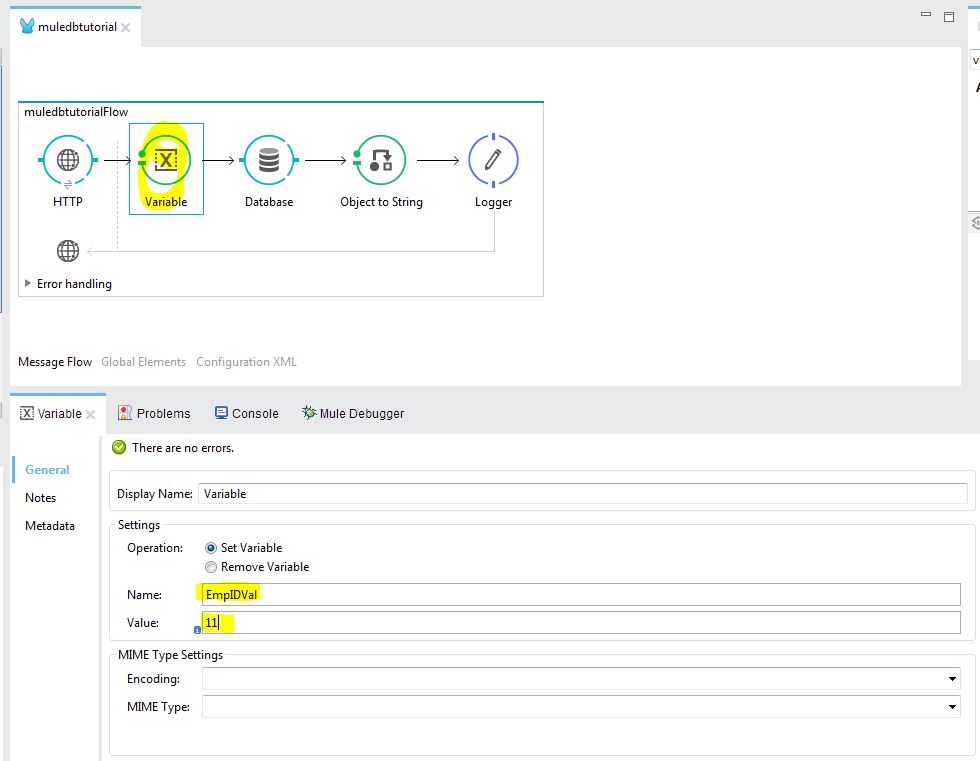
Step 12:
We need to update the database query to get this dynamic value
from the variable.
select * from emp
where id=#[flowVars.empID];

Step 13:
Now again redeploy and check the results ad mentioned below.

Step 14:
Now if you want to pass a variable from the URL as per your
requirement then again go the variable connector and change the value.
#[message.inboundProperties.'http.query.params'.get('EmpIDVal')]

Step 15:
Redeploy it again and check the results by passing a dynamic
value.

Change the value again and check results.


Thanks for sharing valuable information and very well explained.Keep posting.
ReplyDeletemulesoft training in bangalore
mulesoft training in hyderabad
I really enjoy the blog article.Much thanks again.
ReplyDeletejava training
mulesoft training
etl testing training